How to Keep an Air Fryer Like New: A Complete Maintenance Guide
By Amelia Harper | Kitchen and Home Appliance Writer | Updated May 2026
Most people buy an air fryer with genuine enthusiasm, use it constantly for the first few months, and then watch it slowly deteriorate into something sticky, smoky, and vaguely unpleasant without fully understanding why. The basket gets harder to clean. The coating loses its non-stick quality. The machine starts producing smoke and odour during cooking that were not there when it was new. Eventually the appliance that was supposed to make cooking easier becomes something people are reluctant to use.
None of this deterioration is inevitable. An air fryer that is maintained correctly throughout its life performs at the same level on day one thousand as it did on day one. The coating stays intact. The heating is consistent. The results are what they were when the machine was new. The difference between this outcome and the gradual decline most air fryers experience is not luck or an especially durable machine. It is a set of consistent habits applied correctly and from the beginning.
I have been writing about kitchen appliances for nearly a decade, and the maintenance gap between air fryers that last and ones that do not is one of the most consistent patterns I observe. Here is everything that actually matters for keeping an air fryer like new.
1. Clean the Basket and Drawer After Every Single Use
This is the foundational habit that everything else builds on. Skipping even one or two cleaning sessions allows residue to begin the compounding accumulation process that is the primary driver of air fryer deterioration.
Every cooking session leaves behind a combination of food particles, rendered fat, cooking oil, and caramelised sugars on the basket and drawer surfaces. When the machine is used again without cleaning, this residue is reheated to cooking temperature, begins to carbonise, and bonds more firmly to the surface beneath it. Carbonised residue is significantly harder to remove than fresh residue and requires more effort and more risk of coating damage to address.
The practical rule is to clean the basket and drawer while they are still warm, not hot, from the previous cooking session. Warm residue is still soft and loosely bonded to the surface. A brief soak of five to ten minutes in warm soapy water, followed by gentle cleaning with a soft sponge, removes it completely without effort or abrasion.
This five-minute cleaning session done consistently prevents the thirty-minute deep cleaning project that accumulated residue eventually demands. The total cleaning time is the same or less when spread across many short sessions than when deferred to infrequent intensive ones.
2. Always Allow the Basket to Cool Before Cleaning
Timing the cleaning correctly is as important as cleaning at all, because cleaning a basket that is still very hot causes a specific type of damage that accumulates into significant coating deterioration over time.
When a very hot basket is submerged in or exposed to cooler water, the rapid temperature change creates thermal shock. The non-stick coating and the metal substrate beneath it expand and contract at different rates when exposed to this sudden temperature change, and the stress this places on the bond between the coating and the substrate weakens it progressively with each occurrence.
Over many thermal shock events, the coating begins to delaminate at a microscopic level. This manifests initially as subtle loss of non-stick performance in small areas, then as visible bubbling or patchiness, and eventually as flaking that contaminates food and renders the basket unusable.
The correct timing is to remove the basket from the machine after cooking, place it on a heat-safe surface, and allow it to cool for ten to fifteen minutes until it is warm but no longer uncomfortable to handle. At this temperature, residue is still soft enough for easy cleaning and no thermal shock occurs when water contacts the surface.
3. Use Only Soft Cleaning Tools
The cleaning tool matters as much as the cleaning product, and using the wrong tool is the single fastest way to permanently damage an air fryer basket that is otherwise in good condition.
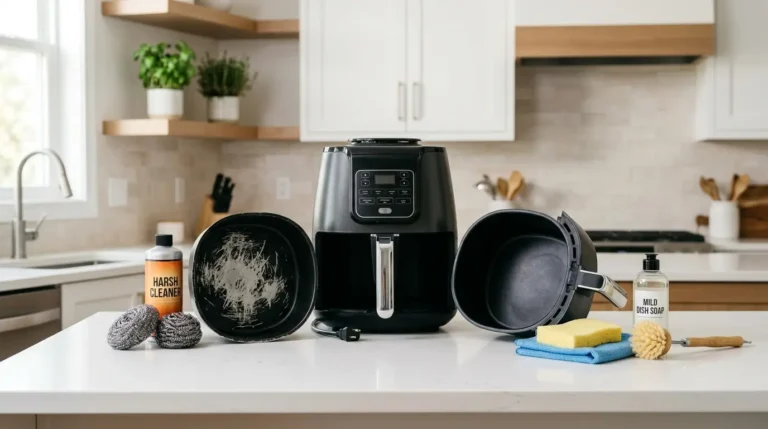
Steel wool, metal scrubbing pads, abrasive sponge surfaces, and even certain stiff-bristled brushes are all capable of scratching non-stick coatings in a single cleaning session. These scratches are not reversible. They become sites where food bonds more readily, where residue accumulates more persistently, and where the coating continues to break down through normal cooking use.
The correct tools are a soft sponge, a microfibre cloth, or a soft-bristled silicone or natural bristle brush. These tools clean effectively when combined with appropriate soaking and warm soapy water without creating any abrasion that affects the coating surface.
For residue that does not respond to gentle scrubbing with a soft tool, the solution is always longer soaking rather than harder scrubbing. Adding baking soda to the soaking water, using hotter water, or extending the soak time to twenty or thirty minutes addresses stubborn residue without the physical force that damages the coating.
4. Never Use Aerosol Cooking Sprays on the Basket
Aerosol cooking sprays are one of the most common and least expected causes of non-stick coating degradation in air fryers, and they are damaging specifically because the harm they cause is invisible until the coating has already deteriorated significantly.
Commercial aerosol sprays contain not just oil but also propellants and emulsifiers, the most common being lecithin. These additives bond to non-stick surfaces at cooking temperature and build up into a residue layer with each use. This layer progressively interferes with the non-stick properties of the coating and creates a sticky surface that is extremely difficult to remove once established.
Many air fryer manufacturers include a specific warning against aerosol cooking sprays in their care instructions for exactly this reason. The damage from spray residue is gradual but cumulative, and it is one of the reasons air fryer baskets lose their non-stick performance despite never being scratched by an abrasive tool.
Applying oil directly to the food using a brush or a refillable pump oil mister filled with pure oil provides the same coating function during cooking without the additive residue. Tossing ingredients lightly in a small amount of oil before adding them to the basket is another effective and spray-free approach.
5. Clean the Heating Element Regularly
The heating element is the coiled component at the top of the air fryer interior, and it is the most consistently neglected part of the machine because it is not removable and not part of the basket that most people associate with air fryer cleaning.
Fat splatter and cooking vapour reach the heating element during every cooking session. When the element is operated with residue on it in the next cooking session, that residue burns at the element’s operating temperature and produces the smoke and burning smell that many air fryer users assume is normal but that is actually a maintenance signal.
Cleaning the heating element requires unplugging the machine completely, allowing it to cool fully, and then inverting the air fryer so the element faces downward. Using a soft brush or a barely damp cloth, gently clean the surface of the element and the area around it. Do not allow water to drip into the interior of the machine or onto the electrical connections.
This step takes two to three minutes and should be done every four to six cooking sessions, or immediately if the element shows visible residue accumulation after fatty or heavily sauced preparations.
6. Wipe the Interior Cavity After Every Few Uses
The interior cooking chamber of the air fryer, the walls, ceiling, and floor of the cavity that surrounds the basket during cooking, accumulates grease and cooking vapour residue that is invisible after one or two sessions but builds into a significant accumulation over weeks of regular use.
Fat that spatters from the basket or drips through the basket mesh contacts the cavity floor and walls. Cooking vapour condenses on the cavity ceiling and leaves a greasy film. These accumulations are reheated in every subsequent cooking session and contribute to smoke, odour, and the general cooking performance decline that users notice but often cannot identify.
Wiping the cavity interior with a damp cloth after every three to four cooking sessions addresses this accumulation before it becomes significant. The cavity surfaces are not coated with the same non-stick material as the basket, so they can withstand slightly more vigorous cleaning than the basket, but gentle wiping with a damp cloth and a small amount of dish soap is still preferable to abrasive approaches.
Ensure the machine is unplugged and completely cool before wiping the interior cavity, and avoid allowing water to drip into the vents or onto the heating element connections during this cleaning step.
7. Clean the Outer Drawer Separately from the Basket
The outer drawer that holds the basket is a separate component that requires its own cleaning attention, and it is frequently neglected because it looks clean from the outside even when significant fat accumulation has occurred inside.
During cooking, fat drips from the food through the basket mesh and collects in the space between the basket and the outer drawer. For most cooking preparations, this fat accumulation is modest after a single session but becomes significant after several sessions without cleaning. When sufficient fat has accumulated, it reaches smoking temperature during subsequent cooking and produces the smoke and smell associated with dirty air fryers even when the basket itself is clean.
Remove the basket from the drawer after cooling, wash the drawer separately with warm soapy water and a soft sponge, and ensure the interior space between the basket position and the drawer walls is included in the cleaning area. This is the zone where fat accumulates most and where the smoking source most commonly originates.
Keeping the drawer as clean as the basket is a simple habit extension that eliminates one of the most frustrating air fryer performance problems entirely.
8. Use Parchment Liners for High-Residue Preparations
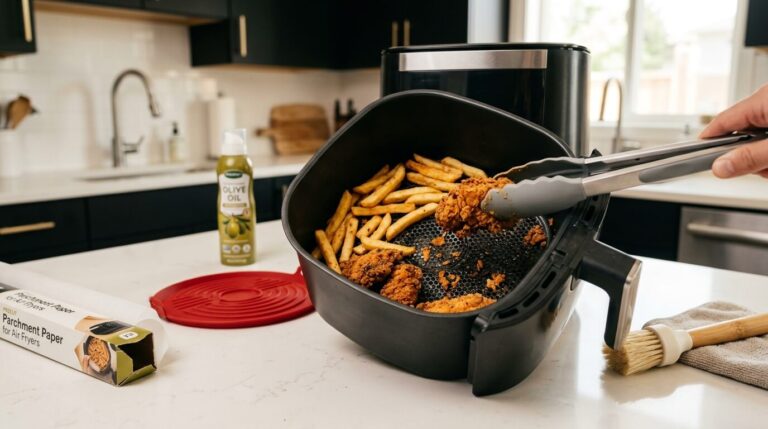
Parchment liners designed specifically for air fryers are one of the most effective passive maintenance tools available because they create a physical barrier between the food and the basket surface for preparations that are particularly likely to produce residue.
Sticky foods, heavily marinated proteins, cheese-containing preparations, and foods with high sugar content in glazes or sauces all produce residue that bonds to the basket surface more aggressively than standard preparations. Using a parchment liner for these specific preparations means the residue bonds to the liner rather than the basket, and the liner is discarded after use.
The critical specification for air fryer parchment liners is perforations. Liners must be perforated with holes that allow air to circulate freely beneath and around the food. Solid parchment without perforations significantly restricts airflow and undermines the air frying mechanism, producing results closer to baking or steaming than the crisp air frying effect the machine is designed for.
Liners should only be placed in the basket after preheating, never before. During preheating with no food to weigh them down, liners can be caught by the high-velocity air circulation and blown against the heating element, where they can scorch or ignite.
9. Dry Every Component Completely Before Reassembly and Storage
Storing air fryer components while they are still wet after cleaning is a low-level maintenance mistake that most people make without realising, and it creates two specific problems that gradually worsen over time.
The first is moisture-related bacterial growth and the musty odour it produces. A wet basket stored inside the closed air fryer machine provides moisture, warmth from the machine’s residual heat, and enclosed air that together create conditions suitable for microbial growth. This growth produces odour that the machine then disperses during subsequent cooking.
The second is accelerated corrosion of metal components, including the basket mesh, any exposed metal at handle fittings, and the metal interior of the outer drawer. Even corrosion-resistant coatings are degraded faster by persistent moisture contact than by dry storage conditions.
After washing and rinsing, dry the basket and drawer thoroughly with a clean cloth and allow them to air-dry for an additional fifteen to twenty minutes before reassembly. If the machine will not be used again until the following day, leaving the basket removed from the machine on a drying rack ensures complete drying before storage.
10. Avoid Overcrowding the Basket During Cooking
The way the air fryer is loaded during cooking directly affects how much residue and moisture is produced inside the machine, which in turn affects how much maintenance is required to keep it in good condition.
Overcrowding the basket traps moisture from the food inside the cooking chamber because the circulating air cannot reach all surfaces of the food to evaporate it. This trapped moisture forms steam that settles on the basket, the drawer, and the cavity walls as condensation. Combined with the fat that drips from the food, this moisture creates a harder-to-clean mixture than dry fat residue alone.
Overcrowding also means food sits on other food rather than on the basket surface, which causes uneven browning and can result in half-cooked portions that need extended cooking time. The additional cooking time in a moisture-saturated environment produces more residue and more maintenance effort than properly loaded batches.
Loading in a single layer with small gaps between pieces allows the hot air to circulate freely, removes moisture efficiently, and produces cleaner, better-cooked results with less residue per cooking session than overcrowded baskets produce.
11. Handle the Basket and Accessories With Care
The physical handling of air fryer components during cooking, serving, and cleaning affects their long-term condition in ways that are easy to overlook because the damage from any single incident is small.
Using metal utensils to remove food from the basket, stacking the basket on metal surfaces after cooking, dropping the basket or drawer during cleaning, and forcing the basket and drawer assembly back into the machine without proper alignment all create physical damage to the coating and the structural components.
Metal utensils scratch the coating with every contact. Metal surface contact can create abrasion marks on the basket exterior. Drops and impacts can cause the coating to crack or chip at the contact point. Forcing misaligned components creates stress at the connection points that weakens the fit over time.
Using silicone or wood utensils inside the basket, placing the basket on a folded cloth or trivet after cooking, handling all components deliberately rather than hastily, and aligning the basket and drawer correctly before pushing them into the machine are all habits that cost nothing and preserve the physical integrity of the components.
12. Store the Air Fryer in a Dry, Clean Location
Where and how the air fryer is stored between uses affects its long-term condition in ways that most owners do not consider because the machine appears to be merely sitting idle during storage.
A storage location with high humidity, such as a cabinet directly above a steaming dishwasher or beneath a poorly ventilated sink, exposes the machine’s exterior and interior components to persistent moisture that accelerates corrosion of metal parts and degrades rubber and silicone components including the basket feet and any gaskets.
A storage location near a heat source, such as directly beside the stove or oven, exposes the machine to ambient heat that gradually degrades the plastics and rubber components used in its construction.
A clean, dry location at moderate room temperature with the basket dry and either stored inside the machine or alongside it is the ideal storage condition. If the kitchen has limited storage options and the machine must live on the counter, placing it away from heat sources and wiping the exterior regularly prevents the dust and grease accumulation that builds on counter-dwelling appliances.
13. Check and Address Small Issues Before They Become Large Ones
Catching and addressing small maintenance issues when they first appear prevents them from becoming the larger problems that require component replacement or that compromise the machine’s performance significantly.
A faint burning smell that appears during cooking usually indicates a small amount of residue on the heating element that is not yet significant but that will become so if not addressed. Addressing it immediately with a heating element cleaning resolves the issue in two minutes. Ignoring it allows the residue to carbonise further with each cooking session, eventually requiring more intensive cleaning that is harder to accomplish without risking damage to the element.
A small area of the basket where food is beginning to stick more than the rest of the basket indicates a patch of coating damage that is in its early stages. Switching to parchment liners for sticky preparations and being particularly careful with cleaning tools in that area prevents the damaged patch from expanding. Continuing to use abrasive tools or high-residue preparations in that area accelerates the damage.
Building the habit of brief inspection before and after each cooking session, looking for new sticking areas, residue on the heating element, and any discolouration or damage on the interior surfaces, catches issues at the point where they are easiest to address.
14. Perform a Monthly Deep Clean
Beyond the after-every-use basket and drawer cleaning, a monthly thorough cleaning of all components addresses the gradual accumulation that regular maintenance does not fully reach.
The monthly deep clean involves cleaning the basket and drawer as usual, cleaning the heating element with a soft brush, wiping all interior cavity surfaces with a damp cloth and a small amount of dish soap, cleaning the exterior housing including the control panel and vents, and inspecting all components for any damage or wear that has developed since the previous inspection.
For machines used daily, a monthly deep clean takes fifteen to twenty minutes because regular maintenance has prevented significant accumulation. For machines used less frequently but not cleaned consistently, the monthly deep clean may take longer and reveal more accumulated residue than expected, reinforcing the value of consistent between-use cleaning.
After the deep clean, run the machine empty at 350 degrees Fahrenheit for five minutes to dry any residual moisture from the cleaning process and to verify that the machine produces no smoke or odour before the next cooking session.
FAQs About Keeping an Air Fryer Like New
How long should an air fryer last with proper maintenance?
A quality air fryer maintained consistently with the habits in this article should last five to eight years or longer. The basket’s non-stick coating typically degrades before the motor or electrical components fail, and replacement baskets are available for most major brands if the basket needs replacing before the rest of the machine does.
Can I spray the interior of the air fryer with water to clean it?
Never spray water directly into the air fryer interior or onto the heating element. Use a barely damp cloth wrung out thoroughly for interior surfaces, and ensure no water drips onto electrical components or into vents. Water inside the electrical components creates both a short-circuit risk and corrosion damage.
My basket has small scratches but the coating is not peeling yet. What should I do?
Stop using metal utensils and abrasive cleaning tools immediately. Switch to parchment liners for cooking preparations that produce residue or involve sticky foods. Use only soft sponges and microfibre cloths for cleaning. Early-stage scratching can be managed to slow further degradation, though the scratched areas cannot be restored.
Does the type of food I cook affect how quickly the air fryer deteriorates?
Yes significantly. Foods with high sugar content in glazes, heavily marinated proteins, and very fatty foods produce residue that bonds more aggressively to the basket and generates more smoke from the heating element. Using parchment liners for these preparations and cleaning immediately after reduces their impact on the machine’s condition.
Is it worth seasoning an air fryer basket like a cast iron pan?
Air fryer non-stick baskets do not benefit from seasoning the way cast iron does. Applying oil to the non-stick surface and baking it in is not necessary and can contribute to the polymerised oil residue that degrades non-stick performance. The basket’s non-stick properties come from its coating, not from a built-up oil layer.
Why does my air fryer produce more smoke than it used to?
Increased smoke during cooking is almost always caused by accumulated fat residue on the heating element, on the interior cavity floor, or in the outer drawer. A thorough cleaning of all these areas, not just the basket, typically resolves the smoking issue completely. Adding a tablespoon of water to the bottom of the drawer during fatty food cooking also reduces smoke.
Can I use the air fryer while part of the basket coating is peeling?
No. Coating that is actively peeling or flaking can shed fragments into food during cooking. Replace the basket before using the machine again if peeling is occurring. Most air fryer manufacturers sell replacement baskets separately, which is considerably more economical than replacing the entire machine.
The Maintenance Mindset That Makes the Difference
Everything in this article comes down to one underlying principle: maintenance is significantly easier when it is consistent rather than reactive. The habits that keep an air fryer performing like new cost very little time when applied regularly and prevent the accumulation of problems that each require significantly more time to address.
Five minutes of cleaning after every use prevents thirty minutes of deep cleaning every month. Careful tool selection in every cleaning session prevents basket replacement within two years. Catching a faint burning smell and cleaning the heating element prevents the smoke problem that makes the machine unpleasant to use.
The air fryer that is performing like new after five years is not a lucky outlier. It is the natural result of applying a small set of deliberate habits consistently from the beginning of ownership.
Amelia Harper is a kitchen and home appliance writer who has covered consumer products for nearly a decade, with a focus on practical guidance that helps home cooks get better results from the appliances they already own.
Related Reading: Air Fryer Cleaning Mistakes | Why Food Sticks to Your Air Fryer | 9 Best Air Fryers Tested and Reviewed